
A brand new kitchen may not be as far out of reach as you think. You can give your kitchen a new look on a budget by simply splashing on a few coats of paint.
If you’d like a whole new look for your kitchen but don’t have the time or money for a total redesign, painting your kitchen cupboards is a quick and economical way to change up the look of your room. Eggshell paint is the best way to go and there is a huge array of Eggshell colours to choose from in the YesColours range.
Why is the eggshell finish the best option for cupboard doors?
Eggshell is incredibly hard wearing so it won’t scuff or dent, making it ideal for cupboard doors that are being slammed shut and knocked into fairly regularly. Eggshell is also great for ‘humid’ rooms like bathrooms and kitchens, as the surface is less susceptible to moisture. And best of all, it’s really easy to put on and very forgiving, too, leaving you with a perfect finish, even if you’re a nursery slopes sort of decorator.
But if you still need a little hand-holding when it comes to painting your kitchen cupboards, just follow our step-by-step guide below.
How do I choose the right paint colour for my kitchen cupboards?
Painting kitchen cupboards is a very much ‘front-loaded fun’ project. Before you do any of the hard work, sit down and plan your colour scheme.
You could go bold and go for our Electric Orange eggshell, a shade guaranteed to wake you up over breakfast and put a smile on your face all day. If you’re doing the walls, too, Electric Orange pairs well with dark blues and pinks, as well as neutrals. Try our Joyful Pink or Passionate Blue paint colours and you'll see for yourself.
For a more muted, calming kitchen, try our Passionate Olive Green paint colour, which looks great in a neutral room, particularly with lots of indoor plants bringing it to life.
Or make your kitchen pretty and restful with a cute shade like our Serene Peach paint colour. Add utensils in ice-cream shades and bowls of colourful fruit for a kitchen that will always lift your mood.
If you need a little more inspiration, order a YesColours Designers Fandeck or book a free colour chat with our colour expert team.
Now you’ve chosen your colours, roll up your sleeves, because the messy bit starts here.
What tools will I need?
Time to gather your tools and get ready for your full kitchen makeover. Here are a few items you will need for painting your cupboards:
- Screwdriver
- Masking tape
- Dust sheet
- Sponge
- Sugar soap
- Fine sandpaper
- Damp cloth
- Small sponge roller
- Suitable primer (if using)
- Paint
- Paint tray.
How to prep my kitchen cupboards for painting?
Before you begin, empty all your drawers and cupboards and remove the drawer fronts and drawers. No one wants paint on their plates or sawdust on their spoons. Make a plan of your kitchen and number the doors and drawers so you know where they need to go back. Take off all the handles and knobs and number them accordingly, too. If you’re going to put new handles on (and why not? Those new cupboards will deserve it!) then you can just recycle the handles and fill any holes with wood filler for now.
How to sugar soap the kitchen surfaces?
Give the cupboards a thorough wipe down to remove any food stains, grease and general kitchen filth. Then use sugar soap to wash them all thoroughly. If you have a dry day and an outside space, that will make life a lot easier. Rinse and dry them all thoroughly before moving on to the sanding stage.
How do I sand my kitchen cupboards?
Use a fine-grade sandpaper - anything from 120 to 220 is ideal. You don’t want to sand away too much of the surface - just smooth out any imperfections and key the surface so the eggshell paint ‘takes’ better.
Start with any corners and difficult bits such as beading, and then move on to the big, flat spaces in the middle of the cupboard or drawer. Always go slowly. You can always sand a bit more but you can’t un-sand what you’ve already done. If you’re working with glossy or laminate cupboards, you might need to sand more than once.
How to prime my kitchen cupboards for painting?
If you’re painting over wood that’s already been painted in a light shade you might be able to skip this stage and get straight on with the painting (woohoo!). However, if you’re painting onto bare wood, or over a very dark colour, priming is well worth your while. A stain-block type primer is good if you’re going over knotty wood or very dark colours, but check that you’re using the right primer for the surface you’re painting on.
Apply a thin coat of the primer using a roller and a good quality brush for any tricky bits. Wait for it to dry, then gently sand, wipe with a damp cloth and leave to dry. Then go again with the primer. Once that’s dry, sand and wipe down one final time. We know it feels incredibly annoying doing layers of primer when your gorgeous paints are just sitting there, in their pouches, giving you the ‘paint with me’ eyes, but your future self will thank you. Be strong.
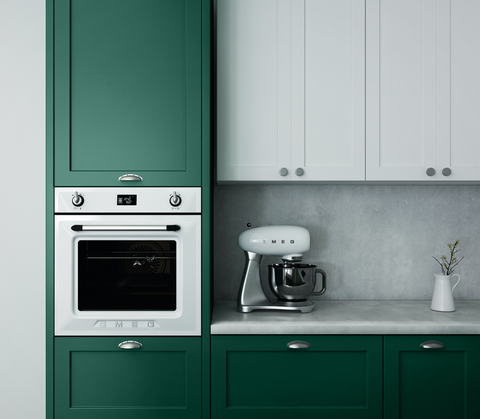
Green is notoriously famous for bringing the good appetite into any kitchen space. So why not use it for your kitchen cupboards? Check out our Loving Green paint colour in eggshell finish for a durable and wipeable performance for your space.
Now that I'm ready to go, how do I paint my kitchen cupboards?
Squeeze a little of your glorious YesColours eggshell paint in the colour of your choice into a paint tray. Pouches don’t need stirring, so your colour should be consistent as soon as it’s poured. Just don't forget to give our squishy pouch a little shake before you open it.
Start with the backs of the doors and drawers and work from the middle out. Use a little paint at a time and don’t overload your roller. You can build up the colour with each layer so just focus on nice, even strokes and getting into every ridge and crevice (you can use a brush for this if the roller isn’t quite getting in there). Once the backs are all touch dry, move onto the fronts.
When the first coat is completely dry, give the cupboard doors a very gentle sanding, wipe down with a damp cloth and let dry again. Repeat the above for a second coat.
How many coats of paint do cupboard doors need?
Two coats of paint at least but it’s worth being patient and getting the colour absolutely right. You could do three or even four coats if you want a deeper colour or to make the paint a little more hardwearing.
Bonus round: order a takeaway.
Yes, this is a vital step. Better still, book a meal out and a hotel for the night. The temptation to put those cupboard doors back on too early is HUGE. Leave them at least overnight but for a few days if you can. In fact, this is a great project to do right before going on holiday.
Fin.
Replace your doors, pour a glass of wine, and put your feet up, smiling the smile of the just and the good. Look at your fabulous kitchen. YOU did that. Little old you.
We hope this step-by-step guide has inspired you to get your hands on our feelgood paint colour palette and give your kitchen cupboards a delicious makeover. And if you need some help with the colours, feel free to book a colour consultation with us and we’ll sort your colour puzzle in no time. Free option is available too!
Share your YesColours home transformation by tagging us on Instagram.